Photoshop & Image Resolution - Basic User Tips
Adobe Photoshop is currently the most widely used photo editing and processing software available today. It's flexibility and ease of use, coupled with it deep pool of features, makes it a great option for ensuring your image file is of sufficient quality for HD metal printing. Below is a basic guide you can follow using Photoshop to make sure your image files will print flawlessly.
Document Size & Pixel Dimensions
A common misconception that many people have in regards to the resolution of an image is that 'resolution' means one, single unit of measurement across varying mediums. This is not the case. Resolution and overall image quality are based on differing factors, depending on wether you may be talking about a printed image, a photograph or a digital image on a computer. Each of these mediums handle image resolution differently. The great thing about Photoshop is that it combines all of those different mediums and factors of measurement, and gives you control over all of them at the same time.
If you open up your photo or artwork in Photoshop, the best and clearest way to see where you stand image quality wise is by using the 'Image Size' dialog box. From the top menu simply select 'Image > Image Size'. The image size popup should look like the one pictured below.
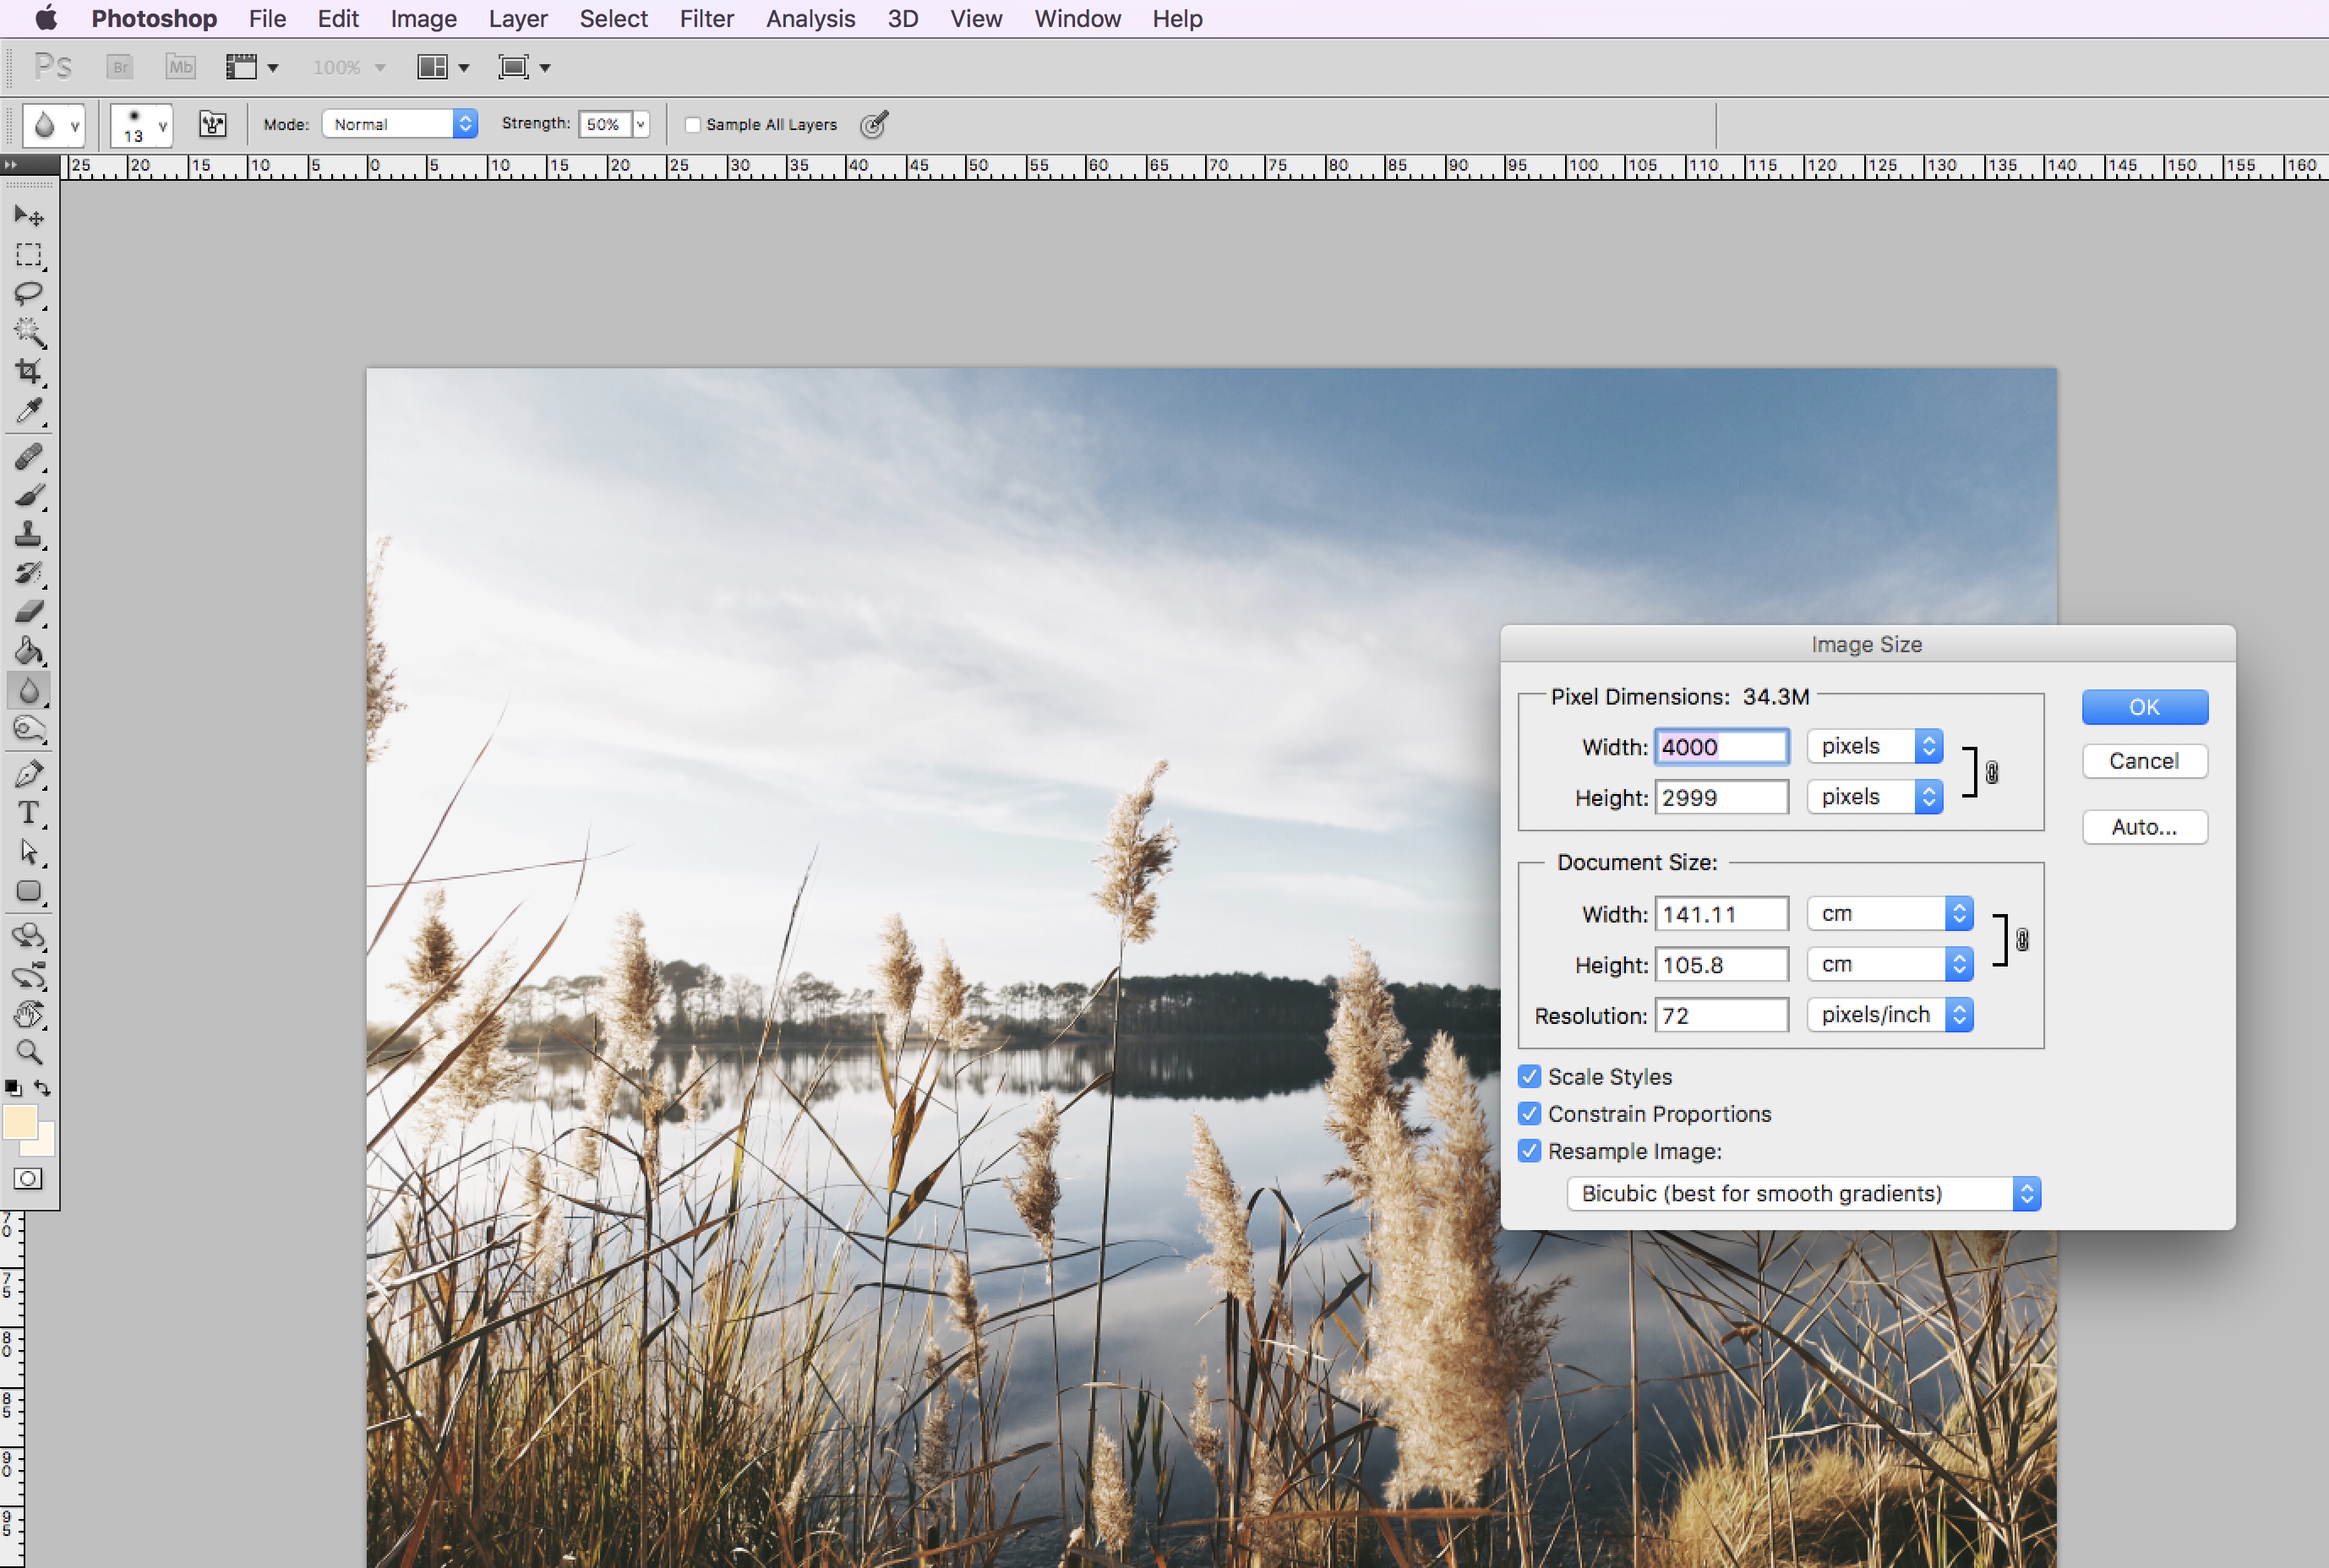
Within the Image Size dialog box you will notice that there are two main sections; 'Pixel Dimensions' and 'Document Size'. Pixel Dimension is a measurement of how many pixels in both width and height your image is comprised of at its current size. This is important information for many reasons, but it mainly relates to how an image will render on digital screens. The Document Size section relates more to physical documents dimensions, which of course is important when it comes to printing the image. The great thing about the Photoshop Image Size panel, is that it measures both of those factors at once, with changes made to one section reflected in the other.
Image Resolution & Resampling
All of this control is great, but how do you then actually use it to make sure your print quality is the best it can be? Thats where image resolution and image resampling come in to play.
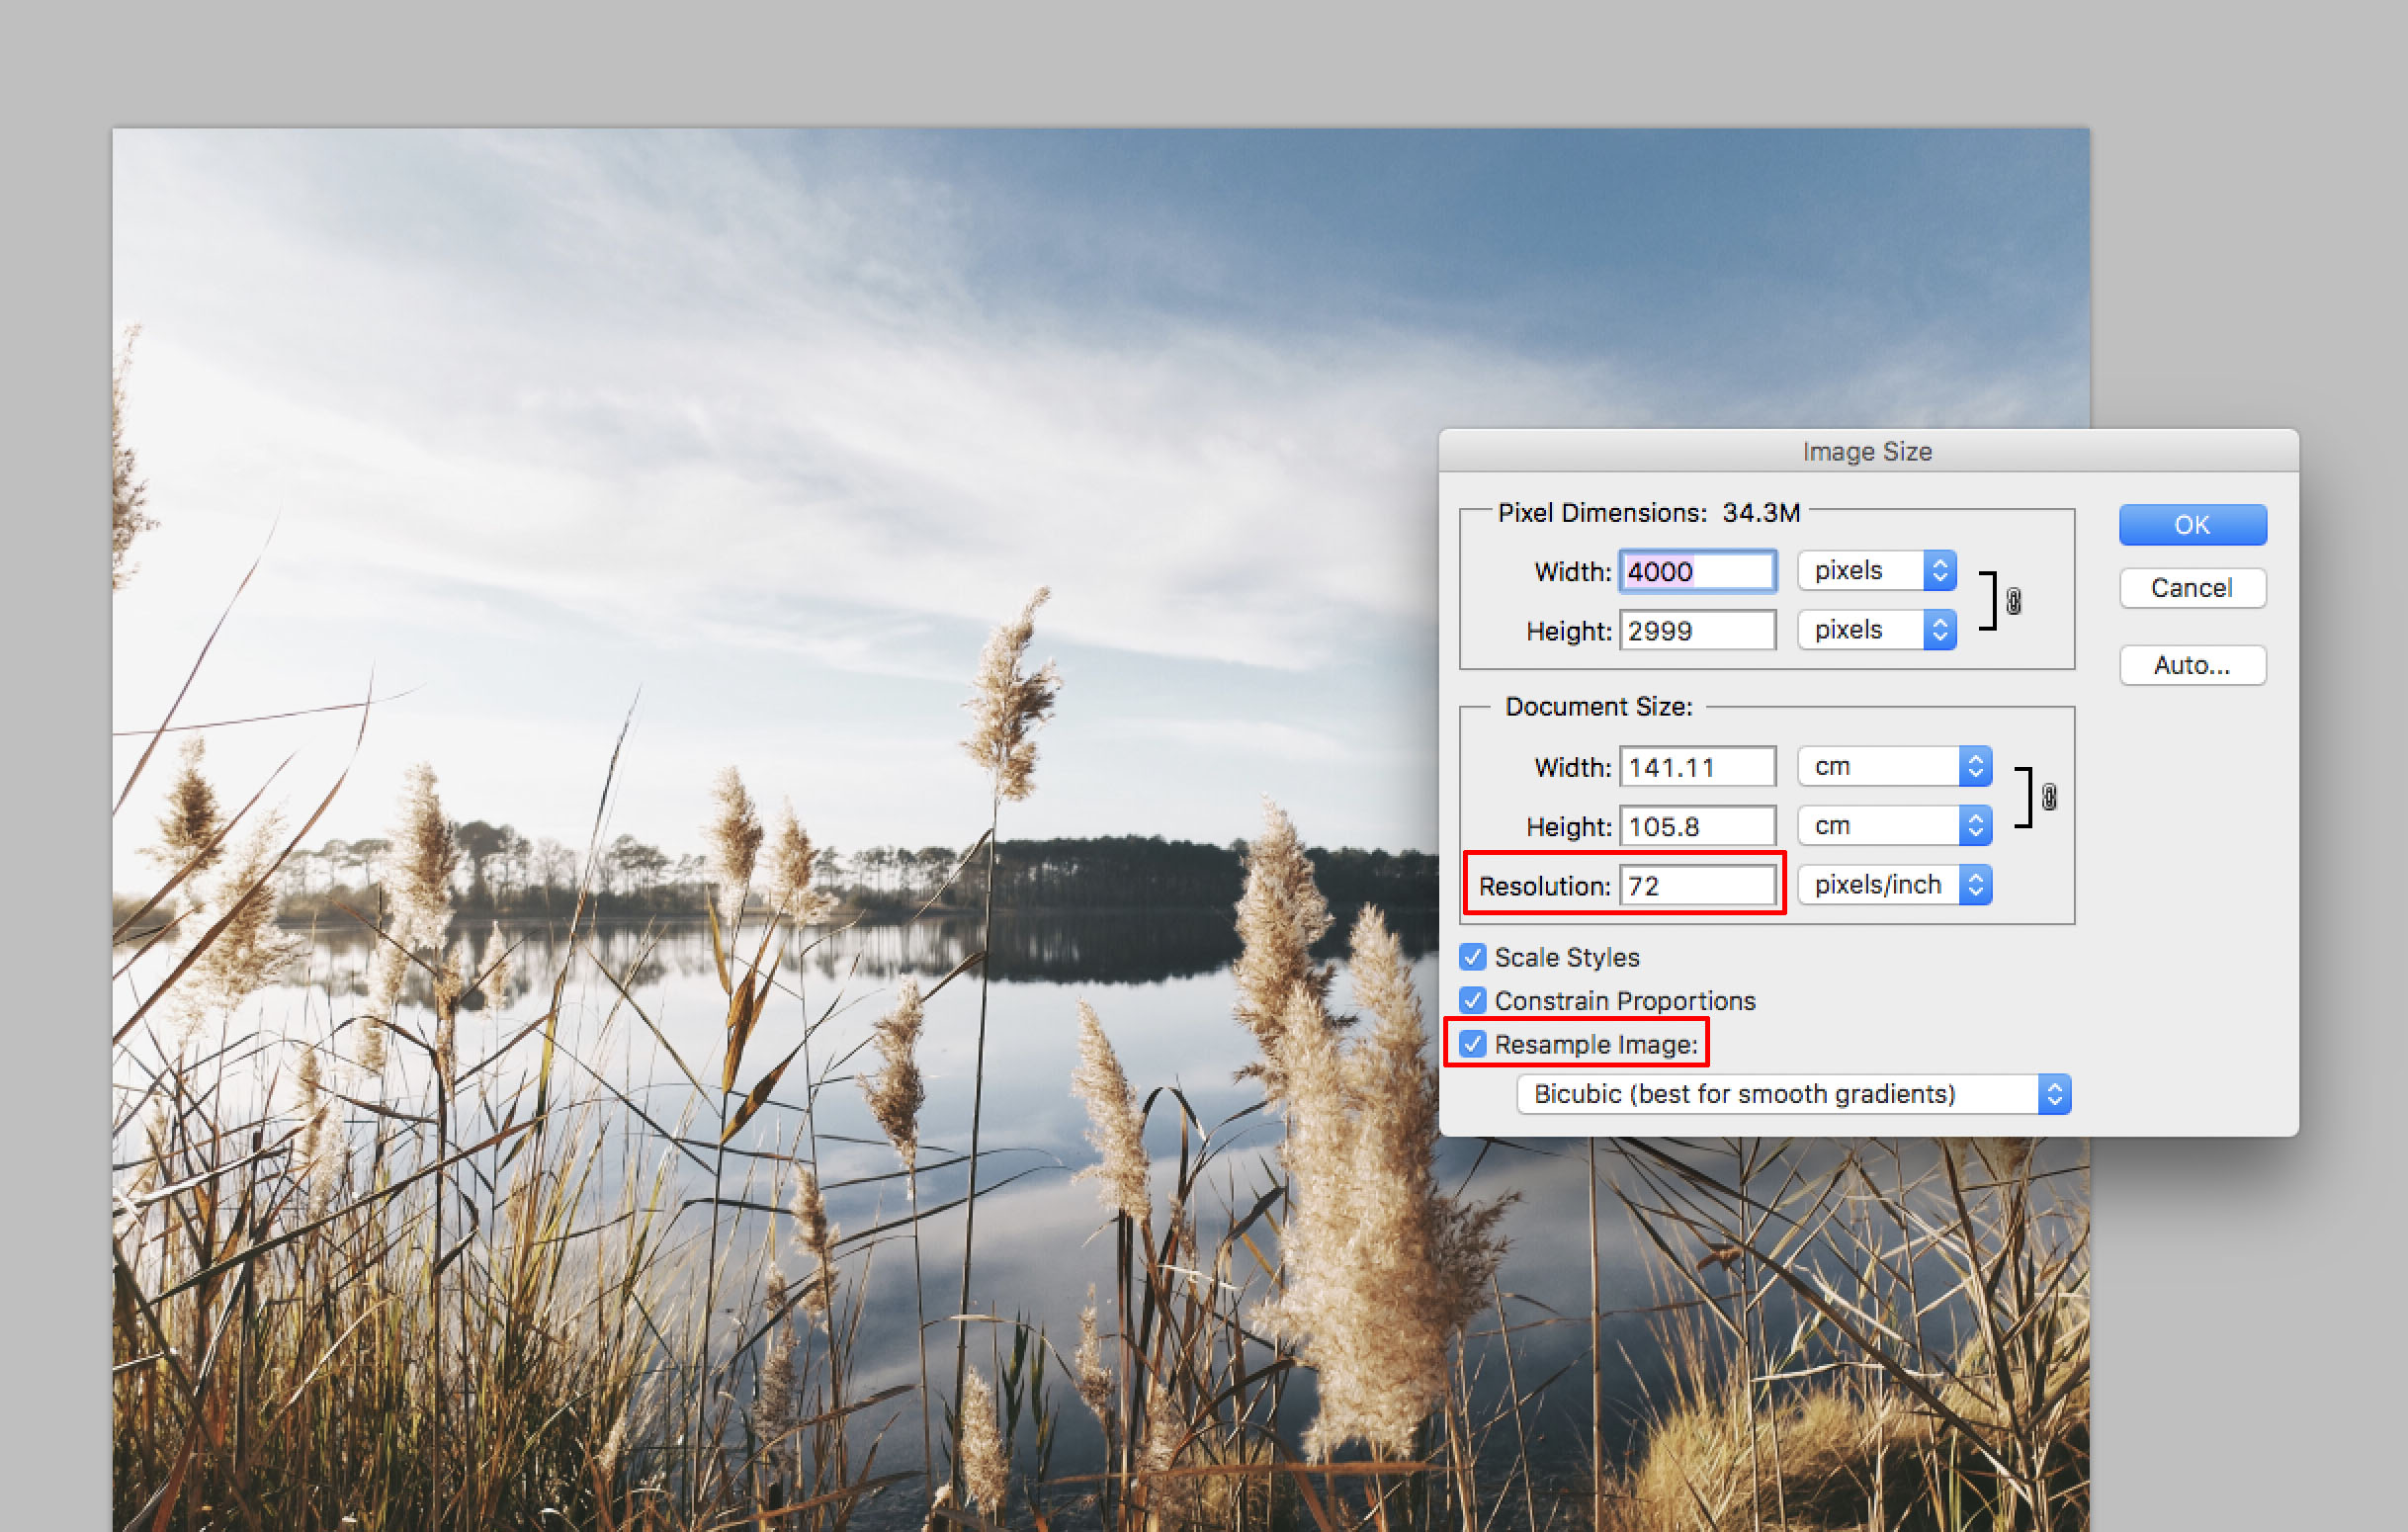
Firstly, what does the 'Resolution' input section mean? Image resolution is a basic measurement of how an image will print based on its current size, measured by default in 'pixels per inch', meaning how many pixels are rendered in every inch of a printed document. Normal resolution for an image viewed on a screen (computer monitor or phone for example) is 72 pixels per inch (PPI). For printing its good to aim for a resolution of 300 PPI or above. By manipulating the resolution section in the Image Size panel, in combination with the required overall document size, you can ensure your finished print file is going to be ideal for high resolution print.
Before you go ahead and start resizing your image, its also important to remember the 'Resample Image' checkbox. Why is this important? In short; the resample option will actually add pixels to your image as you increase it in size or resolution, a process called 'upscaling'. Upscaling means that as you increase the document dimensions, Photoshop will create new pixels per inch, maintaining your predetermined resolution PPI. You can also utilise a similar process to 'downscale' an image. This may be useful if you needed to make an image smaller for use in email or on a website, for example. Making sure that you have resample checked is very important. If you start to increase your document size without it, the scale will change but the pixel dimensions and resolution will not, which may result in a poor quality finished image.
Now that you understand pixel dimensions, resolution and image resampling, how can you use all of this information in a practical way? How can you use it to create a metal print that looks fantastic? Easy! Just follow the steps below.
1. Pick a Metal Print Size
Head over to the HD Metal Prints Australia online store and pick a metal print type (indoor, outdoor, square, rectangle etc). Choose a print size from the dropdown menu. For this example we will pick '20 x 30" / 50 x 75cm'.

2. Open Your Image in Photoshop
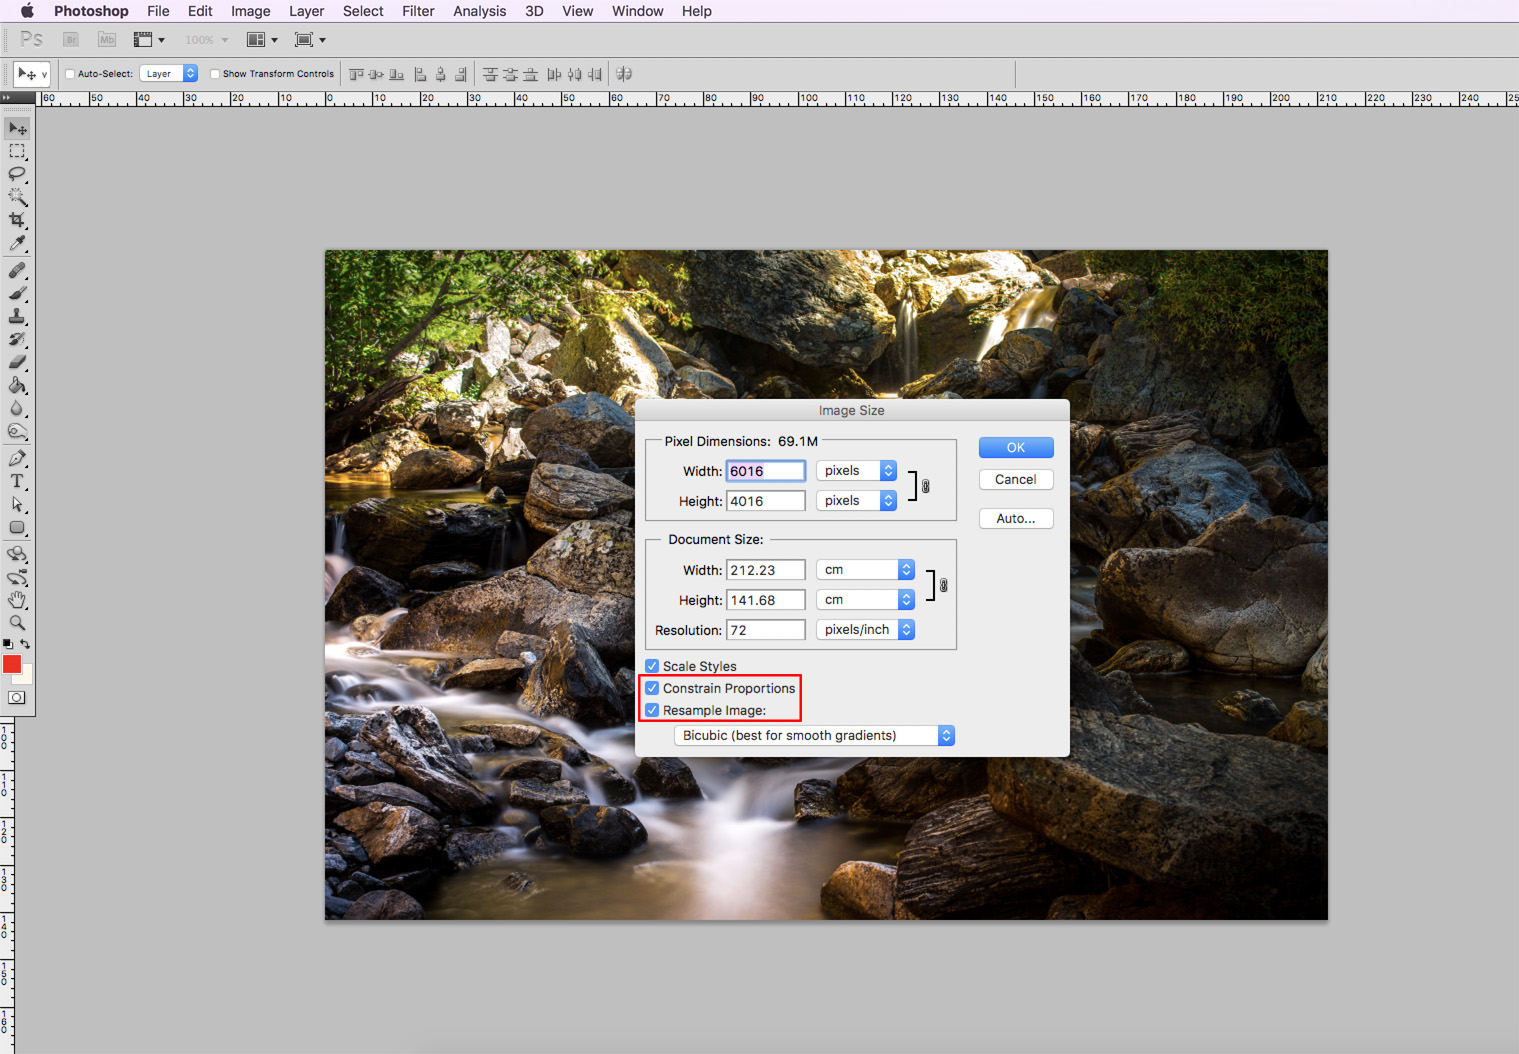
Open up your image in Photoshop. From the top menu select 'Image > Image Size'. Make sure that 'Resample Image' and 'Constrain Proportions' are both checked. Constrained proportions means that when we modify either the length or width, the corresponding dimension will also scale relative to the changes you are making. Without this your image will stretch or skew, which we usually don't want!
3. Set Your Resolution & Document Size
We know that we need the overall document size to be equal or above 50 x 75cm based on the size of the metal print we have chosen. Go ahead and input those dimensions into the 'Document Size' section. Remember that the dimensions are measured in inches by default, but you can change them over to centimeters or millimeters using the dropdown boxes. Set your resolution first. It is recommended to keep the resolution at 300 PPI or above for metal printing.
Now you can set your document size. Depending on wether your image is landscape or portrait oriented, you may need to make either the width or the height the greater of the two dimensions. Your aim here is to have a finished size that is equal to or larger than 50 x 75cm in total size. It doesn't matter if one or both of the image dimensions ends up slightly larger, as the image will be cropped to the correct aspect ratio when uploaded on our website.
Hit the 'OK' button to confirm your settings. Photoshop may take a short moment to resample your image.

4. Check Visual Fidelity
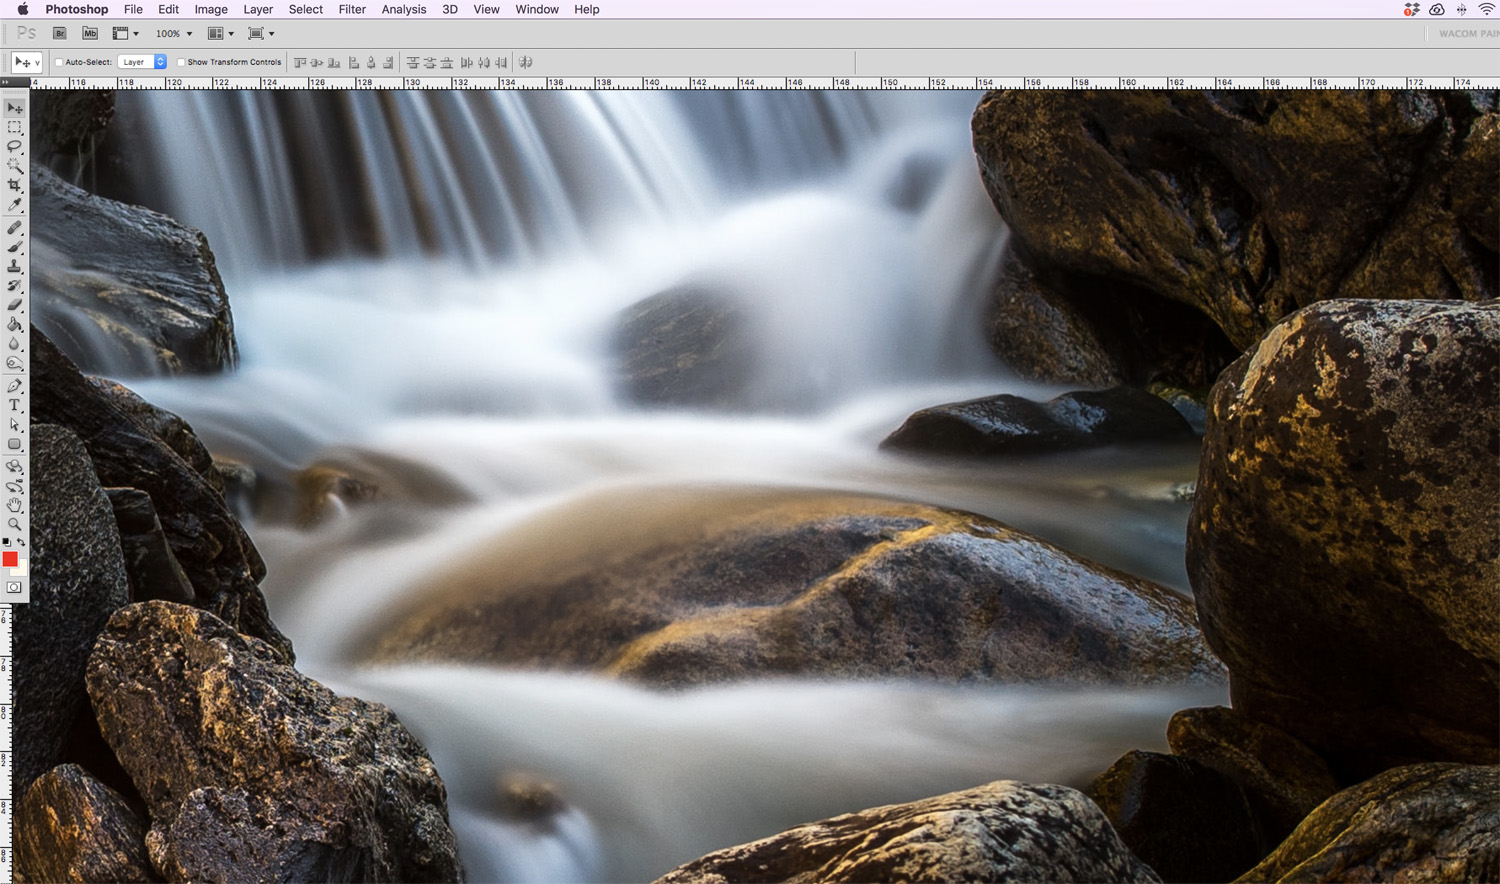
From here its always a good idea to check the actual visual quality of your re-sized image. From the top menu select 'View > Print Size'. This will adjust the zoom level in Photoshop so that the image on your screen is appearing at roughly actual 1:1 print size. Examine a few different sections of the image. Does everything look sufficiently sharp and clear? If so you're ready to move onto the next step. If not, you may need to upscale your resolution further to find a better result.
5. Save Your File For Print
With your dimensions set and resolution at correct scale, you can go ahead and save your file for print. From the top menu select 'File > Save As'. We recommend saving in a TIFF format, but JPG, PNG or PDF will also work well. From there you can upload your image on our store product page, crop it to the desired ratio and submit!


